

MFE vs MAE: Reading a Signal's Heat
A signal that "won" can still have put you through agony before it paid — and one that "lost" might have handed you an easy exit if you had known where it travelled. A win/loss label throws all of that away. Probalist reads two numbers a label hides: how far a signal ran in your favour, and how much heat you took against you. Together they turn a verdict into something you can actually trade around.
Two Numbers a Win/Loss Hides
Mark a trade as a win and you have collapsed its entire life into one bit of information. But two trades that both "won" +1% can be wildly different: one drifted straight up; the other dropped 3% first, sat underwater for hours, then crawled back to +1%. Same label, opposite experience — and opposite implications for your stop.
The two numbers that recover this are borrowed from execution analysis:
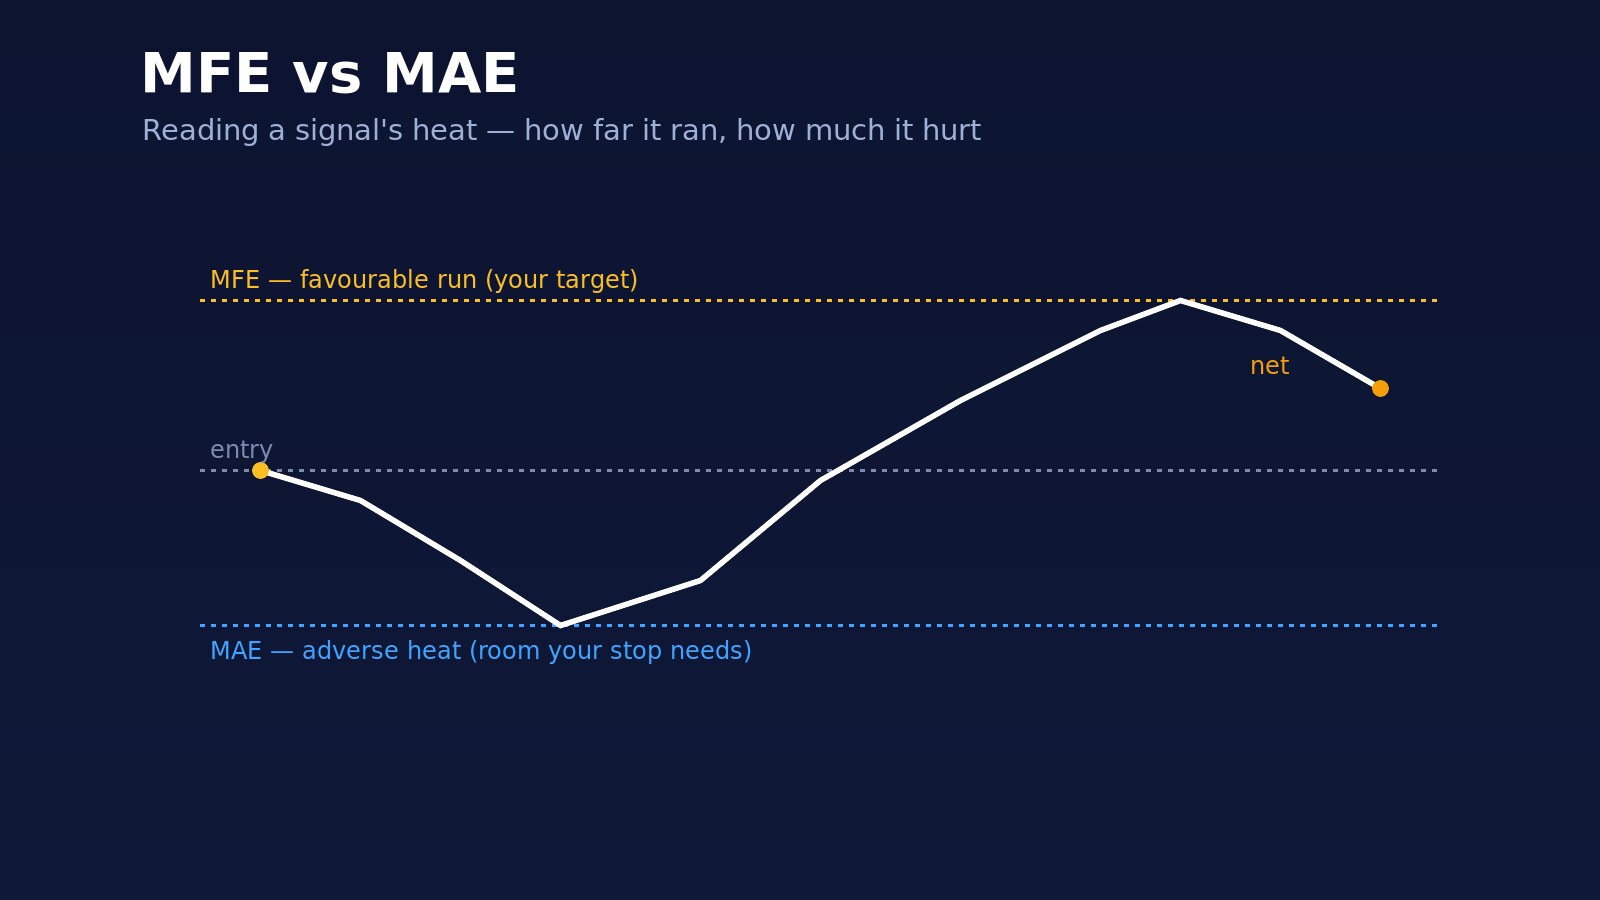
- MFE — Maximum Favorable Excursion: the furthest price travelled in the signal's direction before the trade was over.
- MAE — Maximum Adverse Excursion: the furthest it travelled against you along the way.
MFE is the opportunity. MAE is the heat.
MFE: How Far It Went Your Way
MFE measures the best the signal offered. If a bullish signal's MFE is consistently +2% but you keep exiting at +0.5%, the tool is telling you something concrete: the edge is real and larger than you are harvesting. Your targets are too tight for what this signal historically delivers.
Read across many signals, the distribution of MFE shows you where realistic targets live. It is the honest ceiling — not a promise that the next one reaches it, but a measured record of how much room this kind of setup tends to give.
MAE: How Much Heat You Took
MAE is the more important half, because it is what stops you out. A signal can be right in the end and still take you out at the bottom of a 3% dip if your stop sat at 1.5%.
If winning signals routinely show an MAE of around 2% before they work, a 1% stop is not "tight risk management" — it is a guarantee that you exit good trades at their worst point. MAE tells you the minimum room a signal needs to breathe. Set your stop inside that and you are not managing risk, you are donating to it.
The Net-Edge Verdict
MFE and MAE only mean something together. A signal with big MFE and small MAE is a clean edge: lots of upside, little heat. Big MFE and big MAE is a wild ride that may not be worth the stress even if it nets positive. Small MFE with any meaningful MAE is a signal to skip.
Probalist combines them into a net-edge verdict — the favorable run weighed against the adverse heat across the signal's history, reported per signal. ZigZag Confluence does this on every pivot: each swing carries its own MFE/MAE read and a net verdict, so you see not just that a level mattered but how it behaved for someone who acted on it.
Using Heat to Size Stops and Targets
The practical payoff is that MFE and MAE turn into settings:
- Stop placement comes from MAE — put it beyond the heat that winning signals typically survive, not at a round number.
- Target placement comes from MFE — aim inside the run the signal historically delivers, not at a hopeful round number above it.
- Skip decisions come from the ratio — when typical MAE rivals typical MFE, the signal is a coin flip with extra steps.
As always, this is descriptive: it is the measured heat of this chart and timeframe, not a promise about the next trade. But it is a far better basis for a stop than a guess.